
You are reading: How To Improve i-mop Floor Scrubbing Suction
Key Insights
- Consider the weight of your chosen machine compared to the average operator, who may need to push it for hours or potentially carry it up stairs.
- To find out the cleaning power of your floor scrubber, multiply the revolutions per minute (RPM) of the brushes by the weight applied to those brushes.
- Lithium Ion batteries outperform lead/acid or a gel battery pack, which are overall less suited to regular use and long lifespans.
In this article we will be covering what to check if your i-mop floor scrubber is losing suction and not picking up water from the floor very well. In the example video we are using an i-mop xl variant, however most points can also be applied to the i-mop lite or xxl autoscrubber models.
All brands of floor cleaning equipment require regular maintenance to keep them performing at their best. The i-mop is no exception!
Check The Squeegee Rubbers
Check to see if your squeegee rubbers are worn. The squeegee rubbers on your i-mop will wear and require periodical replacement. These can be rotated to ensure you get the maximum life from your i-mop squeegee rubbers. Refer to our complete guide on When and how to rotate your i-mop squeegee blades for assistance.
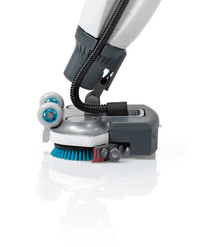
Check Castor Wheels For Wear
The i-mop squeegee castor wheels will wear and require periodical replacement. The below image shows worn i-mop castor wheels which are ready for replacement. These are readily available from i-team i-partners and can be easily replaced yourself. On average you should get between 3-18 months of life from a set of i-mop castor wheels, however this will depend on usage and your floor type.
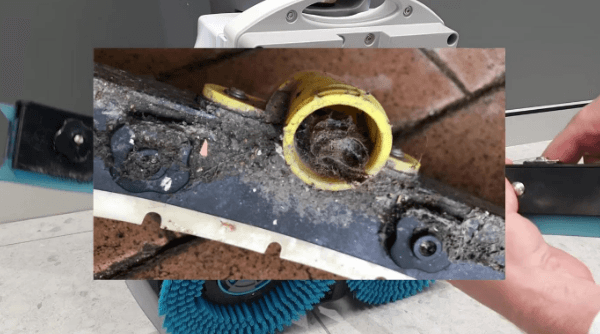
Check Squeegee Assembly
Remove the squeegee assembly and check to ensure there is no blockages in the underside of the squeegee or in the Yellow squeegee connector. An example of a heavily blocked squeegee connector is shown in the below image.
Cleaning the squeegee is an important daily maintenance point, which, if completed, will ensure you never get a blockage buildup like this.
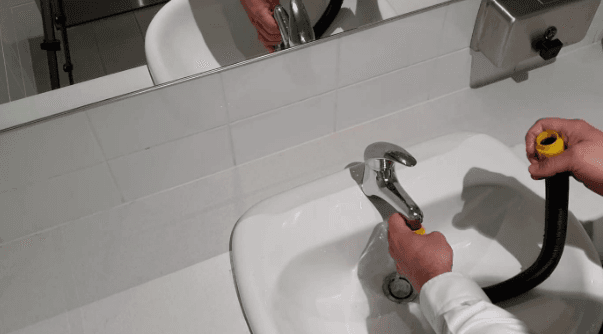
Remove And Check Vac Hose
If your i-mop vacuum hose is not regularly checked and cleaned, it may build up with debris similar to what you see in the attached image of the i-mop squeegee. This will restrict the water flow and cause your i-mop to lose suction. To avoid this, regularly (recommended daily or at least weekly) remove the i-mop suction hose and flush it out as shown in the below image. Stretch it slightly while rinsing it to loosen any buildup stuck within the hose.
Read: 15 Compelling reasons to upgrade to the i-mop floor scrubber.
Check Recovery Tank Lid
To ensure your i-mop is sucking like it should be, ensure the recovery tank lid is firmly tightened. The i-mop recovery tank is a suction chamber so any air allowed to pass into it via a loose tank lid will be reducing the suction pressure on the floor.
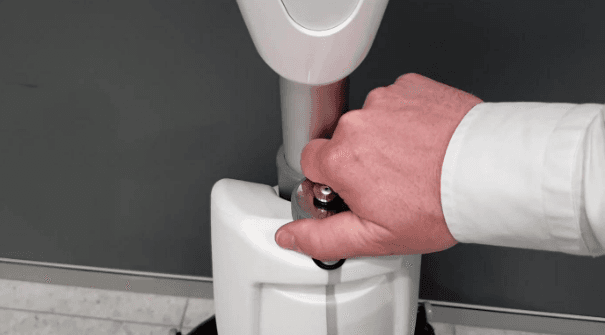
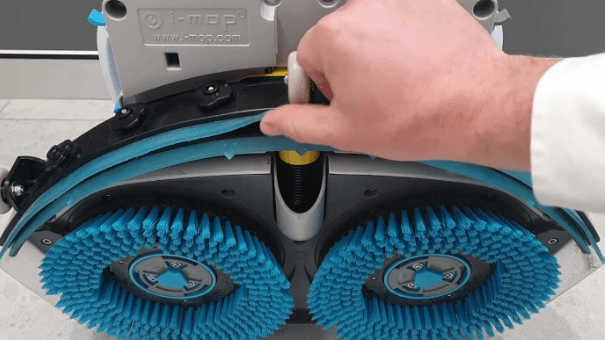
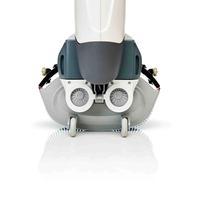
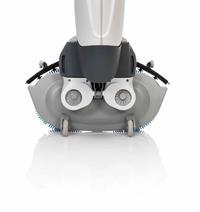
Check Float And Clear Deflector
New models of the i-mop (and older models that have had a post-sale float upgrade) have a float fitted to the recovery tank. To ensure your i-mop floor scrubber is sucking like it should be, this float should be regularly removed and rinsed under clean running water to remove any debris.
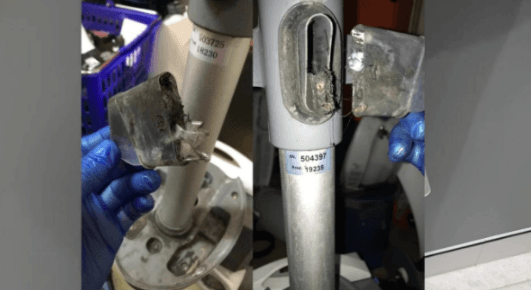
You should also check the clear deflector plate as this is another place debris will build up if this is not correctly maintained. The below image shows 2 i-mops with a buildup of dirt in the clear deflector. This can be simply removed with a screwdriver or a piece of wire, or by actually removing the plate and rinsing it under clean water.
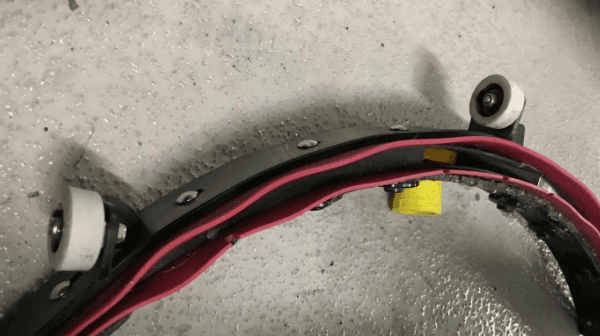
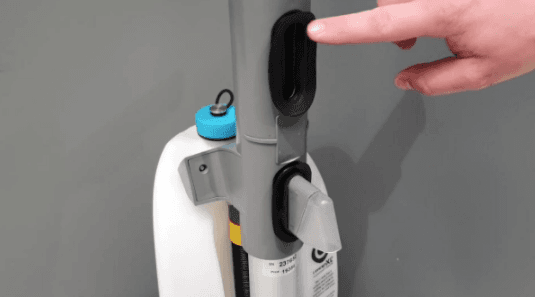
Inspect Black Rubber Seal
If your i-mop is not sucking up water like it should be and you have tried all the above troubleshooting tips, closely inspect the black rubber seals on the handle as indicated in the below image. If these are perished or broken, it will affect the suction of the i-mop and leave your floor wetter than it should. The below image shows the rubber seals in good condition.
If you’ve tried all these troubleshooting tips and watched the above video and your i-mop is still not sucking like you know it should, it’s probably time to have a i-mop specialist technician have a look at it.'
Read how to stop a floor scrubber tank from smelling.
You can get in touch with us to find a repairer for your i-mop here .
Looking to see how the i-mop works for yourself? Book a demo here .
Common Questions Answered
1. What factors affect the suction performance of an i-mop?
Answer: Several factors can influence the suction performance of an i-mop, including the condition of the squeegee blade, the type of floor surface being cleaned, and the water level in the recovery tank. Regular maintenance, such as checking for clogs and ensuring that the squeegee is in good condition, is essential for optimal performance.
2. How often should I clean and maintain my i-mop for better suction?
Answer: For optimal suction, it’s recommended to clean and maintain your i-mop daily. This includes emptying the recovery tank, rinsing the squeegee, and checking for any debris or clogs in the suction system. Regular maintenance helps prevent buildup that can hinder suction efficiency.
3. Can I use different cleaning solutions to enhance suction performance?
Answer: While the type of cleaning solution does not directly impact suction, using the appropriate cleaner for your floor type can help in the overall cleaning effectiveness. Additionally, ensure that the cleaning solution is compatible with the i-mop to avoid any damage and maintain suction performance.
References
i-mop – Maintenance Guide for Optimal Performance
URL: https://www.i-mop.com/maintenance-guide
CleanLink – How to Maintain Your Floor Scrubber for Best Performance
URL: https://www.cleanlink.com/news/article/How-to-Maintain-Your-Floor-Scrubber-for-Best-Performance--23539
Facility Cleaning Decisions – Best Practices for Floor Scrubber Maintenance
URL: https://www.facilitycleaningdecisions.com/article/best-practices-floor-scrubber-maintenance
Products Featured Inside this Article
Media and Insights
Join the movement that’s changing what clean means.
Be part of a cleaner world. Get a live demo at a time that suits you.
Get in touch