You are reading: How To Clean Ceramic Tiles & Grout
25 January 2022
4min read time
Brooke Payne
How To Clean Ceramic Tiles & Grout
Share:

In the most general terms, there are two different types or processes for cleaning ceramic tiles & grout. The first and most common is what we call “Maintenance Cleaning” or light cleaning. This is a regular cleaning process (i.e. daily or weekly) and is designed to maintain a good level of floor hygiene and appearance. The second type of floor cleaning is referred to as “Deep Cleaning”, where you apply a more intensive process to achieve a substantial improvement in floor appearance.
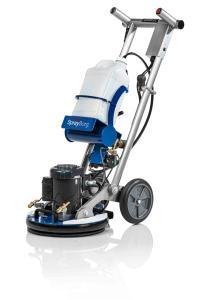
Watch this video to see the Orbot Sprayborg in action clean tiles & grout.
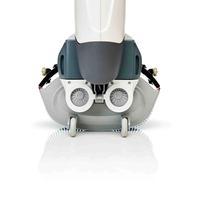
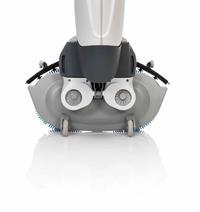
Here we break down these two types of floor cleaning. We have focused on cleaning with the i-mop; however, you could apply these steps with most types of floor cleaning machines.
Maintenance cleaning:
1. Dust mop or sweep floor to remove dust, hair and debris.
2. Use safety signage to warn passers by that cleaning is in progress and floors may be slippery.
3. Fill i-mop solution tank with water
4. If required, add chemicals.
(Note: Unless your floor is particularly dirty, we recommend only adding chemical every second time you clean your floor. Regular cleaning with just water helps ensure you avoid soil-attracting chemical residue build-up):
4.1 Insert the appropriate i-dose pod into the i-dose chamber:
4.1.1 Bathroom floors: use i-dose E33 Washroom cleaner (Pink)\ ii. Kitchen or workshop floors: use i-dose E73 Degreaser (Green)\ iii. General areas: use i-dose E33 Sanitary Floor cleaner (Blue)
4.2 Press i-dose injector button to dispense chemical into tank.
4.3 If you do not have an i-dose tank, manually dilute chemical into i-mop tank according to chemical manufacturers recommendations
5. Select and attach brushes. Refer to the i-mop Accessories Guide for further information on brush options, however the most common brushes for cleaning hard floors are;
5.1 For most smooth to regular textured ceramic tiles we recommend the Medium blue brushes (the standard brushes supplied with the i-mop)
5.2 For highly textured ceramics or those with high levels of soiling we recommend the Hard red brushes.
6. Lower the i-mop deck and turn i-mop control knob to normal cleaning mode (brush, water & vacuum) to begin cleaning the floor. Refer to our Operator Training Video for detailed Operator instructions. For maximum efficiency, cleaning in long straight lines, overlapping slightly.
7. Anytime you need to refill the solution tank, ensure you empty the recovery tank.

Deep cleaning:
1. For best results we strongly recommend you have a Deep Scrub Bracket fitted to your i-mop (only available for i-mop xl/xxl).
2. Dust mop or sweep floor to remove dust, hair and debris.
3. Use safety signage to warn passers by that cleaning is in progress and floors may be slippery.
4. Fill i-mop solution tank with water
5. Add:
5.1 Insert the appropriate i-dose pod into the i-dose chamber:
5.1.1 Bathroom floors: use i-dose E33 Washroom cleaner (Pink)\ ii. Kitchen or workshop floors: use i-dose E73 Degreaser (Green)\ iii. General areas: use i-dose E33 Sanitary Floor cleaner (Blue)
5.2Press i-dose injector button to dispense chemical into tank.
5.3If you do not have an i-dose tank, manually dilute chemical into i-mop tank according to chemical manufacturers recommendations
6. Select and attach brushes. Refer to our Accessories Guide for further information on brush options, however the most common brushes for cleaning hard floors are;
6.1 For deep cleaning high gloss ceramic tiles we recommend the Medium blue brushes (the standard brushes supplied with the i-mop)
6.2 For best results when deep cleaning textured ceramic tiles we recommend the Hard red brushes. Use medium blue brushes if you do not have Hard brushes available.
7. Ensure scrub bracket is lowered to lift the squeegee off the floor
8. Lower i-mop deck and turn i-mop control knob to deep scrub cleaning mode (brush & water, no vacuum). Refer to our Operator Training Video for detailed Operator instructions.
9. Begin scrubbing tiles, ensuring enough chemical is applied to keep the floor wet for at least 5 minutes. It is recommended to deep clean the floor in sections of no more than 20-30 sqm at a time.
Read: Why won't my floor tiles stay clean?
10. Once you have sufficient chemical on the floor you can switch to scrub only mode and continue agitation, ensuring floor does not dry out. Switch to brush & water mode again if floor is drying out.
11. For best results give chemical at least 10 minutes of dwell time and complete at least 2 scrub passes over each section of floor.
12. When you are ready to extract soiling, raise the scrub bracket so the i-mop squeegee is in full contact with the floor. Switch i-mop to brush/vacuum or brush/water/vacuum mode.
13. Remove soiling from the floor by cleaning the entire tiled floor as you would for a regular maintenance clean.
Important: If you have refilled your solution tank with more cleaning solution while scrubbing, remember that you will have to empty your recovery tank partway through to ensure it does not over-fill.
Read: Seven expert tips for improving commercial cleaning productivity.
Common Questions Answered
1. What is the best way to clean ceramic tiles without damaging them?
Answer: Use a pH-neutral cleaner that is safe for tile surfaces, along with a soft mop or sponge. Avoid abrasive cleaners or tools that can scratch the glaze of ceramic tiles. Regular mopping with warm water and a mild detergent helps maintain shine without damage.
2. How do you clean grout between ceramic tiles?
Answer: Grout can be cleaned using a mixture of baking soda and water or a grout-specific cleaner. Use a small brush, like a toothbrush, to scrub the grout lines gently. Avoid harsh chemicals like bleach, which can erode the grout over time.
3. Can you use steam cleaners on ceramic tiles and grout?
Answer: Yes, steam cleaners are effective for ceramic tiles and grout, as the heat loosens dirt and kills bacteria. However, be cautious if the grout is damaged or not sealed properly, as excessive moisture can lead to mold growth or weaken the grout.
References
The Spruce – How to Clean Ceramic Tile Floors
URL: https://www.thespruce.com/how-to-clean-ceramic-tile-floors
Home Depot – Cleaning Grout Between Tiles
URL: https://www.homedepot.com/grout-cleaning
Better Homes & Gardens – Cleaning Ceramic Tile and Grout
URL: https://www.bhg.com/clean-ceramic-tile-grout
Products Featured Inside this Article
Media and Insights
Join the movement that's changing what clean means.
Be part of a cleaner world. Get a live demo at a time that suits you.
Book a Demo

