
You are reading: How To Clean Vinyl Floors
In the most general terms there are two different types or processes for cleaning vinyl floors. The first and most common is what we call “Maintenance Cleaning” or light cleaning. This is a regular cleaning process (ie daily or weekly) and is designed to maintain a good level of floor hygiene and appearance. The second type of floor cleaning is referred to as “Deep Cleaning”, where you apply a more intensive process to achieve a substantial improvement in floor appearance.
Here we break down these 2 types of floor cleaning. We have focussed on cleaning with the i-mop, however you could apply these steps with most types of floor cleaning machines.
Maintenance cleaning: of vinyl floors
1. Dust mop or sweep floor to remove dust, hair and debris.
2. Use safety signage to warn passers by that cleaning is in progress and floors may be slippery.
3. Fill i-mop solution tank with water
4. If required, Add chemicals (Note: Unless your floor is particularly dirty, we recommend only adding chemical every 2nd time you clean your vinyl floor. Regular cleaning with just water helps ensure you avoid soil-attracting chemical residue build-up):
4.1 Insert the appropriate i-dose pod into the i-dose chamber:
4.1.1 Bathroom floors: use i-dose E33 Washroom cleaner (Pink)\ ii. Kitchen or workshop floors: use i-dose E73 Degreaser (Green)\ iii. General areas: use i-dose E33 Sanitary Floor cleaner (Blue)
4.2 Press i-dose injector button to dispense chemical into tank.
4.3 If you do not have an i-dose tank, manually dilute chemical into i-mop tank according to chemical manufacturer's recommendations.
5. Select and attach brushes. Refer to the i-mop Accessories Guide for further information on brush options, however the most common brushes for cleaning vinyl floors are;
5.1 For structured vinyl floors (with an undulating surface) we recommend the Regular blue brushes (the standard brushes supplied with the i-mop )
5.2 For smooth vinyl floors we recommend using pad drives with pads. For the best results the preferred pads would be Green twister diamond pads, however alternatively use Red pads. If pad drives are not available, the regular blue brushes may be used.
6. Lower the i-mop deck and turn i-mop control knob to normal cleaning mode (brush, water & vacuum) to begin cleaning the floor. Refer to our Operator Training Video for detailed Operator instructions. For maximum efficiency, cleaning in long straight lines, overlapping slightly.
7. Anytime you need to refill the solution tank, ensure you empty the recovery tank.
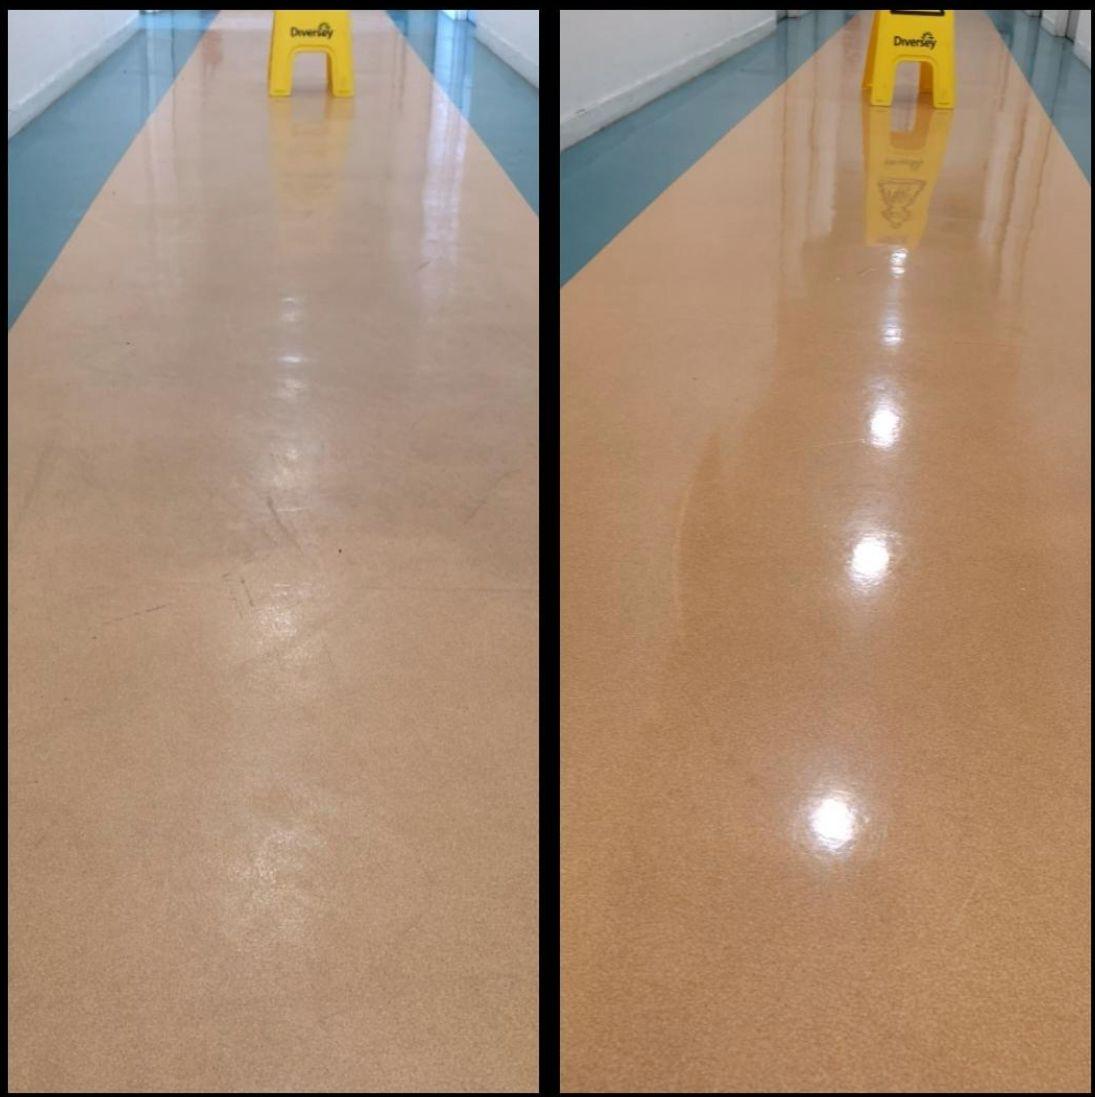
The image above shows the results from cleaning a smooth vinyl floor with blue brushes, vs the image on the right which shows the same floor after consistent daily use of Green Twister pads
Deep cleaning: vinyl floors
1. For best results we strongly recommend you have a Deep Scrub Bracket fitted to your i-mop (only available for i-mop xl/xxl).
2. Dust mop or sweep vinyl floor to remove dust, hair and debris.
3. Use safety signage to warn passers by that cleaning is in progress and floors may be slippery.
4. Fill i-mop solution tank with water
5. Add chemicals:
5.1 Insert the appropriate i-dose pod into the i-dose chamber:
5.1.1 Bathroom floors: use i-dose E33 Washroom cleaner (Pink)\ ii. Kitchen or workshop floors: use i-dose E73 Degreaser (Green)\ iii. General areas: use i-dose E33 Sanitary Floor cleaner (Blue)
5.2 Press i-dose injector button to dispense chemical into tank.
5.3 If you do not have an i-dose tank, manually dilute chemical into i-mop tank according to chemical manufacturer's recommendations.
6. Select and attach brushes. Refer to our Accessories Guide for further information on brush options, however the most common brushes for cleaning hard floors are;
6.1 For deep cleaning of structured vinyl floors (with an undulating surface) we recommend the Regular blue brushes (the standard brushes supplied with the i-mop)
6.2 For smooth vinyl floors we recommend using pad drives with blue pads. If pad drives are not available, the regular blue brushes may be used.
7. Ensure scrub bracket is lowered to lift the squeegee off the floor
8. Lower i-mop deck and turn i-mop control knob to deep scrub cleaning mode (brush & water, no vacuum). Refer to our Operator Training Video for detailed Operator instructions.
9. Begin scrubbing the vinyl floor, ensuring enough chemical is applied to keep the floor wet for at least 5 minutes. It is recommended to deep clean the floor in sections of no more than 20-30 sqm at a time.
10. Once you have sufficient chemical on the floor you can switch to scrub only mode and continue agitation, ensuring floor does not dry out. Switch to brush & water mode again to apply more solution if floor is drying out.
11. For best results give chemical at least 10 minutes of dwell time while completing at least 2 scrub passes over each section of floor.
12. When you are ready to extract soiling, raise the scrub bracket so the i-mop squeegee is in full contact with the floor. Switch i-mop to brush/vacuum or brush/water/vacuum mode.
13. Remove soiling from the floor by cleaning the entire tiled floor as you would for a regular maintenance clean.
Important: If you have refilled your solution tank with more cleaning solution while scrubbing, remember that you will have to empty your recovery tank partway through to ensure it does not over-fill.
Read: How to clean rubber floors?
Watch this video to learn more about different brushes or pads for cleaning different floor types.
Products Featured Inside this Article


Media and Insights
Join the movement that's changing what clean means.
Be part of a cleaner world. Get a live demo at a time that suits you.
Book a Demo