
You are reading: Everything You Need to Know About Using and Maintaining the i-mop XL Floor Scrubber
16 December 2024
30min read time
Brooke Payne
Everything You Need to Know About Using and Maintaining the i-mop XL Floor Scrubber
Share:

Key Insights
- The i-mop XL bridges the gap between traditional floor cleaning methods and industrial scrubber machines, offering professional-grade cleaning power in a uniquely compact and maneuverable design.
- With proper care and maintenance, the i-mop XL delivers a minimum 7-year working life, extending beyond 10 years when maintained correctly - making it a long-term investment in facility cleanliness.
- The machine's eco-friendly design goes beyond efficient water usage - through the Made Blue partnership, every liter of water used by the i-mop creates a matching contribution of clean drinking water in developing countries.
Thanks for checking out our i-mop total user guide!
We’ve put this together to help you get the most out of your i-mop, without all the technical jargon. Whether you're using it for the first time or just looking for tips, this guide has everything you need to know about using and maintaining your i-mop. For a wider look at machine options and applications across different environments, explore our guide to floor scrubbers .
Let’s start with the five key benefits of the i-mop:
FASTER: It cleans up to 10 times faster than traditional wet mopping, covering up to 1800 m² per hour.
CLEANER: The i-mop’s powerful 350 RPM brushes remove dirt effectively, with results showing up to 90% cleaner surfaces.
GREENER: It uses less water and fewer chemicals, reducing environmental impact by over 75%.
SAFER: Floors dry quickly to reduce slip hazards, with slip test readings of 120 or less. Plus, the antibacterial tanks help eliminate odors and keep operators safe.
BETTER FOR EVERYONE: The i-mop makes cleaning easier and more enjoyable, improving the cleanliness and atmosphere of your facility.
Purpose of this Guide
Proper operation and maintenance of your i-mop XL floor cleaning system is essential for achieving optimal performance and ensuring operator safety. This comprehensive guide covers everything facility managers and cleaning professionals need to know about safely operating and maintaining their i-mop XL including:
- Personal operator safety
- Intended and non-intended use of the i-mop XL
- Instructions for daily use
- Maintenance instructions
- Storage conditions
- Disposal of the i-mop XL
What is the i-mop XL?
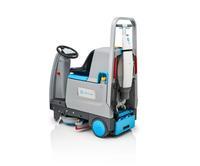
At its core, the i-mop XL is a professional-grade floor cleaning machine that revolutionizes how facilities maintain their floors. Standing apart from conventional cleaning equipment, it features a unique design that combines mobility with industrial-strength cleaning power. The machine's distinctive characteristic is its compact, maneuverable form factor that delivers the performance typically associated with much larger cleaning equipment.
For some details on i-team ANZ and the history of the i-mop we’ve put together its story here .
Customer Care Service
1800 861 030
Support Email
hello@i-teamanz.com
Key Benefits of the i-mop XL
Advanced Cleaning Technology
The i-mop XL's dual counter-rotating brush system sets a new standard in floor cleaning efficiency. These brushes work in tandem to deliver a deep, thorough clean that surpasses traditional mopping methods. The system's design ensures consistent contact with the floor surface, reaching areas that conventional cleaning equipment might miss.
Precision Edge Cleaning
One of the most remarkable features of the i-mop XL is its ability to clean right up to edges and under obstacles. This eliminates the need for additional manual scrubbing in hard-to-reach areas, saving time and ensuring consistent cleaning results throughout the facility.
Eco-Friendly Operation
The i-mop XL demonstrates environmental consciousness through its efficient use of water and cleaning chemicals. The system's precise control over resource usage not only reduces waste but also promotes faster drying times, minimising slip hazards and allowing for immediate foot traffic in cleaned areas.
Innovative i-dose® System
The integrated i-dose® system represents a significant advancement in cleaning solution management. Using concentrated cleaning pods, this system eliminates guesswork and waste in detergent application. The pod-based approach ensures consistent cleaning solution strength while minimizing environmental impact through reduced packaging and transport requirements.
Hygiene-Focused Design
The i-mop XL features antibacterial tanks that achieve a bacterial reduction rate of ≥99.99%. This exceptional hygiene standard not only protects operators but also helps eliminate unpleasant odors that can develop in cleaning equipment. The antibacterial properties ensure that the machine itself doesn't become a source of contamination.
Ergonomic Operation
Understanding the physical demands of cleaning operations, the i-mop XL incorporates several ergonomic features. The drive and park support system allows operators to maneuver the machine with minimal effort. The ability to park the machine without lifting the deck reduces physical strain and prevents potential workplace injuries.
We’ve put together an article on how floor scrubbers work for some more information, you can take a look at that here .
Intended Use of the i-mop XL
The i-mop XL is specifically designed for scrubbing floors. It works best with water-based scrubbing detergents, and you’ll find that it’s versatile for different cleaning needs. The cap for the solution tank and lockers for the brushes are color-coded in HACCP-approved colors (blue, green, red, yellow, and orange), which is handy when you need to use different cleaning solutions for different areas.
For example, you might use one color set for a kitchen area and another for a dining area to prevent cross contamination. It’s essential to make sure that the solution tank and brush are always the same color to avoid cross-contamination.

Non-Recommended Use of the i-mop XL
While the i-mop XL is designed to tackle many floor cleaning tasks, there are a few important things to keep in mind to ensure your safety and maintain the machine’s warranty:
- Never use the i-mop XL near flammable materials like gasoline or oil, or on floors with dangerous chemicals or vapors.
- Stick to water-based cleaning solutions and avoid using flammable or corrosive detergents
- Make sure the water temperature doesn’t exceed 113°F (45°C) as anything hotter could damage the tank.
- Avoid using cleaning solutions that are too acidic or alkaline, with a pH level below 3 or above 11.
- Never use the i-mop XL over electrical outlets to prevent the risk of electrical shock.
- And importantly, never carry passengers on top of the i-mop XL or use it as a step-ladder.
- Always store the i-mop XL in a dry, sheltered space to protect its electronic components from the elements.
- Only use parts supplied by the manufacturer for maintenance.
Lifespan and Maintenance
The i-mop XL is built to last. It demonstrates exceptional durability with a operational lifespan of at least 7 years. With proper maintenance and care, users can expect to extend the machine's service life beyond 10 years, making it a long-term investment in your facility's cleaning infrastructure. This industry-leading longevity reflects the i-mop XL's build quality and reliability, ensuring a strong return on investment.
The lifespan of the i-mop XL's brushes and squeegee blades depends largely on the surfaces being cleaned, with rougher surfaces naturally causing more wear. Regular inspection of these components is key to maintaining optimal cleaning performance. To ensure long-term reliability and safety, we recommend having your i-mop XL serviced by an authorized i-team partner every 500 operational hours. This professional maintenance schedule helps preserve the machine's efficiency and extends its service life.

Modifications and Customisations
It’s important not to modify the i-mop XL floor scrubber without consulting the manufacturer first. Unauthorized changes can void the warranty and potentially cause issues with performance or safety. Always reach out to the manufacturer for advice if you’re considering any modifications.
i-mop XL Specifications
Here are some specs for the i-mop XL:
- Size: 120 x 48 x 46 cm (store position: 120 x 48 x 36 cm)
- Weight: 22.5 kg (including batteries)
- Battery: Li-ion (25.2V, 14Ah, 353Wh)
- Battery Operation Time: 90 minutes
- Brush Pressure: 31.5 gr/cm²
- Brush Speed: 350 RPM
- Detergent Tank Capacity: 4 L
- Recovery Tank Capacity: 6 L (recommended max: 4 L)
- Noise Level: 64.9 dB (1m distance)
- Performance: Up to 1,800 m² per hour (practical: 1,000 - 1,300 m² per hour)
- Vibration: <0.4442 mm amplitude, <0.008 m/s velocity
- Castor Wheels: Yes
- Power Cut-off at Store Position: Yes
- Floating Ball for Recovery Tank: Yes
- Hour Counter: Yes
The i-mop XL’s compact design and advanced features make it an excellent tool for floor scrubbing, delivering high performance while being easy to use and maintain.
Warranty
The i-mop® XL floor scrubber comes with a 24-month commercial warranty, but it’s important to use it as intended to ensure this coverage. Using the i-mop XL for any unintended purposes can void the warranty. To keep everything in top condition and avoid issues, make sure to follow the guidelines outlined in the manual.
Identification
You can find the serial number of your i-mop XL on the deck of the machine. This will be helpful for maintenance, repairs, or warranty claims.
Description
The i-mop XL represents Dutch engineering excellence at its finest. Developed in the Netherlands and manufactured in China, this innovative floor cleaning machine combines sophisticated design with practical functionality. The machine's compact yet powerful build makes it a standout solution for professional cleaning, offering industrial-grade performance in a remarkably maneuverable package.
Key Components and Design
At its core, the i-mop XL consists of two primary components engineered to work in perfect harmony:
The Body:
- Houses the advanced motor system that powers the cleaning operation
- Features integrated solution and recovery tanks for efficient water management
- Includes an ergonomically designed handle with intuitive trigger controls
- Contains the user-friendly control panel for precise operation
- Incorporates smart technology for optimal cleaning performance
The Scrub Deck:
- Features the dual counter-rotating brush system
- Includes the precision-engineered squeegee assembly
- Delivers consistent floor contact for superior cleaning results
- Enables edge-to-edge cleaning capability
One of the i-mop XL's most practical design features is its ability to fold into a compact position when not in use. This smart storage solution not only protects the machine's components but also makes it ideal for facilities where space is at a premium. The folding mechanism is engineered for durability, allowing for thousands of transitions between operating and storage positions throughout the machine's lifetime.
General Safety Tips for the i-mop XL
Ensuring safe operation of your i-mop XL isn't just about protecting your investment—it's about creating a secure working environment for your cleaning team. While the i-mop XL incorporates numerous safety features in its design, following proper operational procedures is essential for maintaining both operator safety and machine performance. These comprehensive safety guidelines have been developed based on extensive field experience and user feedback, addressing everything from basic preparation to specific operational considerations.
The following safety tips cover crucial aspects of i-mop XL operation, from preliminary floor preparation to battery management. By incorporating these practices into your daily cleaning routine, you can help prevent equipment damage, avoid workplace incidents, ensure your warranty remains intact as well as maximize the effectiveness of your cleaning regime:
- Sweep Before Scrubbing: Always remove any objects from the floor that might get caught in the rotating brushes to avoid damage.
- Check the Brushes: Inspect the brushes before use. Always turn off the machine and store it properly before replacing the brushes.
- Machine Orientation: When inserting cleaning fluid or batteries, make sure the body of the i-mop XL is upright.
- Keep Antibacterial Tanks Protected: Keep the antibacterial tanks out of direct sunlight to avoid discoloration.
- Mind the Magnets: The i-mop XL features integrated magnets that hold the fluid tanks in place. If you wear a pacemaker, make sure to keep a distance of at least 6 inches (15 cm) from these magnets.
- Battery Safety: Always use the battery charger provided by the manufacturer. Never crush, pierce, heat, or damage the batteries. Always keep them dry and avoid short-circuiting. Charge the batteries in a temperature range of 5°C–40°C (41°F–104°F), and only use the machine in a temperature range of 5°C–45°C (41°F–113°F).
Customer Care Service
1800 861 030
Support Email
hello@i-teamanz.com
Safety During Operation
Dress Safely: Avoid wearing loose clothing, jewelry, or anything that could get caught in the rotating parts of the i-mop XL.
Mark the Job Site: If you’re using the machine without the vacuum function, mark the area with a wet floor sign to warn others of potential slip hazards. This is not needed when the vacuum function is on unless required by local laws.
Park Safely: Never park the i-mop XL on ramps or sloped surfaces. Always ensure it’s on a level surface. Don’t rely solely on the drive support to park the machine, as it could tip over.
Drive Support Caution: Avoid using the drive support as a parking tool, as this may cause the i-mop XL to fall.
How to Care for the i-mop XL After Operation
Remove Batteries for Safety: Always remove the batteries before performing any cleaning or maintenance tasks, or when storing the machine.
Machine Position: Keep the i-mop XL in an upright position when replacing parts like the brushes or squeegee.
Storage: Never store the i-mop XL on ramps or sloped surfaces. Always store it on a level, hard surface and not in the park position.
Transport and Storage
Proper transport and storage practices play a crucial role in maintaining your i-mop XL's performance and extending its operational life. While the machine is built for durability, following correct handling procedures helps prevent unnecessary wear, protects sensitive components, and ensures your equipment is always ready for use.
Whether you're moving the i-mop XL between facilities, storing it between shifts, or preparing it for long-term storage, proper handling is essential. Not only does this protect your investment, but it also helps maintain the machine's warranty compliance and prevents potential safety issues that could arise from improper storage conditions.
Here are some tips to help:
General Storage Tips
- Always store the i-mop XL in an upright position when filling the cleaning solution tank or inserting batteries.
- After each use, drain the machine and remove the batteries before storage.
- Storing the Machine
- Before placing the i-mop XL in store position, make sure to deactivate both the drive support and park support.
- To store it, push the vacuum hose back into the machine so it doesn’t get pinched. Then, slowly lift the scrub deck and guide the body into the resting position.
Transport Outside
- When moving the i-mop XL outside, always store it in the store position (as described above).
- Carry it by the handle with one hand and the scrub deck with the other. Be cautious as the transport wheels aren’t designed to roll over dirty surfaces.
Transport in a Vehicle
- The best way to transport the i-mop XL in a vehicle is in the upright position. Ensure both tanks are empty, and remove the batteries.
- Secure the i-mop XL using a tension belt or another appropriate restraint to keep it safe during transport.
- By following these safety, storage, and transport guidelines, you’ll help ensure that your i-mop XL stays in top working condition for years to come.
Assembly and Installation of the i-mop XL
Unboxing Components
Setting up your new i-mop® XL is a straightforward process designed to get you cleaning in no time. This section will guide you through unboxing the components, assembling the machine, and preparing it for its first use. Here’s what you’ll find in the box to help you get started:
- i-mop XL main body
- Batteries and charger (if ordered)
- Squeegee assembly and brushes
- Solution and recovery tanks
- Waste bin and user manual
Take a look at our video here unboxing a brand new i-mop XL floor scrubber, and breaking down the bundled accessories that you’ll find inside the box.
Key Assembly Steps
Proper initial setup of your i-mop XL is crucial for achieving the best cleaning performance and ensuring its long-term reliability. While the machine is designed for user-friendly operation, taking the time to complete each setup step correctly will help you maximize its capabilities and protect your investment.
This step-by-step guide below will walk you through the entire setup process. Before we begin, ensure you have a clean, well-lit workspace and access to the necessary power outlets for initial battery charging. Having all components readily available will make the setup process smooth and efficient.
Charging the Batteries
Refer to the battery charger manual for detailed instructions as charge times may differ dependent on the batteries chosen. Be sure to charge the batteries regularly to maintain consistent performance.
Attaching the Brushes
1. Put the i-mop in store position.
2. Align the left/right brushes with their respective motor disks.
3. Push each brush onto the disk and rotate clockwise or anticlockwise until secure.
Attaching the Squeegee
1. Connect the vacuum hose to the squeegee.
2. Align and attach the squeegee pins to the scrub deck holes.
3. Push both sides into place until firmly connected.
Installing the Recovery Tank
1. Position the tank bottom against the i-mop front.
2. Push the top until the magnetic lock clicks into place.
Installing the Cleaning Solution Tank
1. Place the tank valve side down onto the i-mop.
2. Press downward to open the valve seal, then push forward until it clicks.
Installing the Recycle Bin
Slide the recycle bin into its designated slot at the rear.
Drive Support Installation (i-mop XL PRO)
1. Place the i-mop in the active position.
2. Remove the batteries if present.
3. Unscrew and replace the drive support bracket, ensuring bolts and nuts are securely tightened.
By following these simplified steps, you’ll ensure the safe transport and proper assembly of your i-mop XL, ready for use with minimal hassle.
Transporting the i-mop XL
Moving your i-mop XL doesn't have to be complicated, but a few simple precautions will protect both you and your machine. Whether you're heading down the hall or to another site, here's what you need to know to transport your i-mop XL safely and get it ready for cleaning.
To Move the Machine:
Place it in the store position.
Hold the handle securely and walk slowly, especially over obstacles.
Lift over obstacles using both hands: one on the handle, the other on the scrub deck.
Getting to the Job Site:
Crouch down and hold the scrub deck firmly with one hand.
Push the handle forward with your other hand to lower the scrub deck to the floor.
Warning: Never use your foot to push down the scrub deck.
By following these steps, you can safely and efficiently operate the i-mop XL.
How to Use The i-mop XL
Let's walk through the battery installation and solution preparation process, paying special attention to the color-coding system that helps prevent errors and ensures correct assembly.
Inserting the Batteries
1. Use only i-power® batteries designed for the i-mop.
2. Insert the blue-coded battery into the corresponding blue slot; a click confirms it’s locked.
3. Insert the grey-coded battery into the grey slot; ensure it clicks into place.
4. Monitor battery levels via the control panel indicators.
Tip: Avoid operating with batteries below 40% charge.
Filling the Cleaning Solution Tank
1. Remove the yellow cap from the tank.
2. Fill with up to 4L (1 gallon) of water.
3. Secure the yellow cap tightly.
For i-dose users:
1. Remove the old pod and cap.
2. Insert a new i-dose pod into the injector.
3. Replace the cap and press the injector button to dispense the solution.
4. Align the indicator ring color to match the i-dose pod.
Take a look at our guide on cleaning chemicals here for some more information on what you can use with your i-mop.
Operating Procedures
How to Operate the i-mop XL
It’s time to get you up and running with your i-mop XL! The machine offers four different cleaning modes to tackle any job, and steering is as intuitive as riding a bike. Here's everything you need to know about handling your i-mop XL effectively.
1. Starting the Machine
Stand behind the i-mop and use the main switch to select your cleaning mode:
Mode 1: Brush + Water/Cleaning Solution
Mode 2: Brush Only
Mode 3: Brush + Vacuum
Mode 4: Brush + Water/Cleaning Solution + Vacuum
2. Hold the handle with both hands and squeeze the trigger to start moving.
3. Walk behind the i-mop and steer by gently turning the handle left or right.
4. Release the trigger to stop the i-mop immediately.
Tip: Learn to swivel the i-mop like steering a bicycle for precise movement, including 360-degree turns.
Warning: Avoid operating the i-mop at more than arm’s length or below a 45-degree angle to prevent water from entering the vacuum engine.
There are so many benefits of using a floor scrubber such as the i-mop XL, if you’d like to know more about them click here .
Drive Support
The i-mop XL floor scrubber features a convenient drive support system designed to make maneuvering the machine easier and more efficient. This system helps reduce the weight of the handle by up to 2.75 kg, making it simpler to turn and mop, even in tight spaces.
To activate Drive Support:
- Push the park support bracket down.
- Lean the i-mop against the drive support to stabilise.
- To deactivate, push the entire bracket down.
Warning: Do not park the i-mop on the drive support; it may fall sideways.
Park Support (i-mop XL Pro Models Only)
The i-mop XL Pro is equipped with a park support feature that allows you to park the machine in a standing position for short breaks of up to 10 minutes without having to lift the scrub deck. The i-mop's vertical parking position helps to reduce wear and tear on the machine. It also allows the user to easily inspect the brushes, squeegees, and caster wheels.
After 10 minutes, the i-mop will activate an alarm and blinking lights, and the machine will disable itself to prevent unnecessary strain.
To activate Drive Support:
- Push the park support lever up to activate.
- It’s important to note that the park support should only be used for short breaks (under 10 minutes).After 10 minutes, an alarm and blinking lights will activate, and the i-mop will disable itself. To silence the alarm lift the scrub deck and restart the device.
Warning: Avoid long-term storage in the park position to prevent wear on the brushes.
ECO Mode
The i-mop XL floor scrubber dryer features an "Eco Mode" setting designed to promote water efficiency during cleaning. By activating Eco Mode, the machine reduces water consumption by up to 40%, making it an environmentally friendly choice while still delivering effective cleaning results.
To activate simply:
- Press the ECO button on the bottom right of the dial.
- Press the button again to deactivate.
Turning Off the i-mop XL
When finishing a cleaning session, properly turning off the i-mop XL ensures optimal machine performance and protects the battery. Here’s how to do it:
- Select Mode 3 (Brush + Dry Vacuum) to remove remaining cleaning solution while moving 15–20 feet (4–6 meters).
- Turn the main switch to the OFF position.
Note: The vacuum motor will continue running for 3 seconds after switching off.
Emptying the Tanks
Properly emptying the tanks after use is crucial for maintenance and hygiene. Follow these steps for efficient tank disposal:
- Dispose of used water or cleaning solution into an appropriate drain.
- Empty the recovery tank each time the cleaning solution tank is refilled.
Warning: Follow local wastewater disposal regulations.
Cleaning and Storage
A clean machine is a reliable machine. Taking a few minutes for proper cleanup and storage after each use helps keep your i-mop XL floor scrubber performing at its best and ready for your next shift. Here's your guide to end-of-day maintenance:
Flushing the System
1. Fill the solution tank with 0.5–1L of clean water.
2. Run Mode 4 (Brush + Water + Vacuum) to flush remaining solution from the system.
Cleaning the Tanks
Rinse both tanks with clean water. Partially fill, tilt, and shake to remove dirt.
Tip: Leave caps slightly open to dry the tanks before storage.
Removing the Battery Packs
1. Place the i-mop in store position.
2. Press the battery pins inward and pull the packs out.
3. Store charged batteries in a dry place, charging them monthly if not in use.
Inspecting Brushes and Squeegee
Brushes: Clean under running water or replace if the wear indicator matches bristle height.
Squeegee: Clean with water or replace worn blades.
Storing the i-mop XL Floor scrubber
1. Place the i-mop in store position.
2. Store upright, near a wall, with the handle facing outward and brushes towards the wall.
This guide ensures safe, efficient, and effective operation of the i-mop XL.
Maintenance and Care for the i-mop XL
Regular maintenance isn't just about fixing problems—it's about preventing them. While the i-mop XL is built to last, knowing how to properly maintain and replace key components will keep your machine cleaning effectively day after day. Let's walk through the essential maintenance procedures you need to know:
General Cautions:
- Always remove the battery before performing cleaning or maintenance tasks.
- Keep the i-mop® XL in an upright position when replacing brushes or the squeegee.
Brush Replacement
1. Position the i-mop® XL in store mode (refer to section 4.2).
2. Hold the scrub deck securely.
3. Left Brush: Turn anticlockwise until resistance is felt, then pull off the motor disk.
4. Right Brush: Turn clockwise until resistance is felt, then pull off.
5. Inspect the motor disks and clean the scrub deck with a dry cloth before reinstalling.
Squeegee Replacement
1. Detaching the Squeegee:
2. Position the i-mop® XL in store mode.
3. Hold the scrub deck and pull both sides of the squeegee to detach it.
4. Remove the vacuum hose by twisting it.
Flipping/Replacing the Squeegee Blades:
1. Unscrew the 8 plastic nuts and remove the rear plate.
2. Detach the rubber blades:
First time: Flip the blades to use the opposite side.
Subsequent times: Replace with new blades.
3. Reattach the rear plate and secure with the 8 nuts.
Note: Special blades with arrow-like shapes cannot be flipped and must always be replaced.
Attaching the Squeegee:
- Connect the vacuum hose to the squeegee, ensuring a firm fit.
- Align the scrub deck pins with the squeegee holes and press both sides into place.
Replacing the Vacuum Hose:
- Detach the squeegee.
- Remove the solution tank to access the vacuum hose connection.
- Twist the hose connector anticlockwise to disconnect, then carefully pull the hose from the machine.
- Insert the new hose through the opening and connect it by twisting clockwise.
- Reattach the squeegee.
Recommended Cleaning
Just as your i-mop XL Floor Scrubber Dryer keeps your facilities spotless, it needs its own regular cleaning routine to maintain peak performance. These straightforward cleaning recommendations are designed to fit easily into your maintenance schedule, helping protect your investment while ensuring consistent cleaning results.
Weekly: Clean the i-mop® XL exterior using a non-abrasive cleaner or a damp cloth to remove any dirt or debris.
Brushes: Remove the brushes to thoroughly clean the scrub deck, ensuring optimal performance.
Regular cleaning will help extend the life of your i-mop XL and keep it running efficiently.
Recommended Service for your Floor Scrubber
Regular professional servicing keeps your i-mop XL running at its best and helps prevent unexpected downtime. Here's when your machine needs professional attention:
First Service: After 200 operational hours.
Full Service: Every 500 operational hours by an authorized service partner.
Keep track of your machine's usage by monitoring the timer on the control panel, where each decimal step represents 6 minutes of use. Regular servicing will help ensure your i-mop XL continues to perform at its best.
Accessories
The i-mop® XL is designed to work with a range of i-mop® approved brushes and polishing pads. To ensure optimal performance and avoid potential damage to floors, only use accessories that are approved by i-mop®. If you're unsure or need further guidance, please contact your sales representative or provider for assistance.
- The i-mop® XL supports different brushes and polishing pads.
- Use accessories only if trained, as improper use may damage floors.
- Contact your sales representative or provider for further guidance.
This concise guide ensures ease of use while adhering to safety and maintenance requirements.
Troubleshooting Guide for i-mop XL
Even the best equipment occasionally needs a helping hand. While your i-mop XL is designed for reliability, knowing how to quickly solve common issues keeps your cleaning operations running smoothly. This troubleshooting guide walks you through simple solutions to typical challenges you might encounter. Most problems can be resolved in minutes, getting you back to cleaning with minimal disruption.
| Problem | Possible Cause | Solution |
|---|---|---|
| No Power | No batteries | Insert batteries. |
| Empty batteries | Charge batteries. | |
| Batteries incorrectly placed | Remove and reinstall batteries. | |
| Insufficient/No Water Flow | Wrong program | Check the operating mode on the control panel. |
| Eco mode on | Verify the ECO mode light on the control panel. | |
| Empty tank | Fill the tank. | |
| Tank incorrectly placed | Ensure the tank valve clicks onto the nipple, then reposition the tank. | |
| Filter blocked | Clean the filter and ensure no dirt is present in the solution tank. | |
| Blocked water pipe | Request professional service. | |
| Poor Water Recovery | Squeegee opening blocked | Clean the squeegee opening by removing the pipe. |
| Tears in squeegee blades | Replace the squeegee blades. | |
| Filter blocked | Check and clean the yellow filter if needed. | |
| Vacuum hose blocked | Inspect and clear blockages in the vacuum hose. |
Decommissioning and Disposal
When your i-mop XL floor scrubber dryer reaches the end of its service life, proper disposal isn't just good practice—it's part of our commitment to environmental responsibility. While these machines are built to last, when the time comes for retirement, here's how to ensure your i-mop XL is disposed of properly and sustainably.
Steps for Disposal:
1. Flush the machine: Refer to the above.
2. Remove the batteries: Dispose of separately or reuse in other i-team equipment.
3. Detach loose components: Remove brushes, tanks, and squeegee.
Dispose of all components in accordance with local laws and recycling guidelines.
Attachments
To maintain safety and performance, it’s important to ensure that all attachments used with the i-mop XL are compliant with CE certification standards. This guarantees the equipment meets necessary safety, health, and environmental protection requirements. Always check the certification before use for optimal functionality and compliance.
Partnership with Made Blue
The i-team ANZ commitment to sustainability goes beyond efficient cleaning. Through our partnership with Made Blue, we've transformed everyday cleaning operations into a force for global good. For every liter of water used by your i-mop XL, we ensure an equal amount of clean drinking water is made available in developing countries.
This innovative "water-matching" program helps address one of the world's most pressing challenges: water scarcity. With approximately 780 million people worldwide lacking access to clean drinking water, every cleaning task you perform with your i-mop XL creates a ripple effect of positive change.
The program works by:
- Tracking water usage through i-mop operations
- Matching each liter used with clean water investments
- Supporting sustainable water projects in developing regions
- Creating lasting impact through improved water infrastructure
By choosing the i-mop XL, you're not just investing in superior cleaning technology—you're becoming part of a global solution to water scarcity. This partnership demonstrates how innovative business practices can address environmental challenges while delivering exceptional cleaning results.
Conclusion
The i-mop® XL isn’t just a cleaning machine—it’s a solution designed to address practical cleaning challenges while contributing to global sustainability efforts. Its innovative features, thoughtful design, and partnership with Made Blue make it a standout tool for efficient, responsible cleaning.
Whether it’s troubleshooting performance issues, ensuring proper maintenance, or considering disposal, the i-mop empowers users to clean smarter and more sustainably. With every use, you’re not just improving your space but also making a positive impact on the world.
For any additional assistance, service inquiries, or to learn more about the i-mop and its accessories, feel free to contact our team. Together, we can achieve cleaner spaces and a better planet.
If your after even more information, take a look at our Article on the Top Questions Answered About the i-mop Floor Scrubber here.
References
All the information in this article is sourced from the i-mop User Guide .
Products Featured Inside this Article

Media and Insights
Join the movement that's changing what clean means.
Be part of a cleaner world. Get a live demo at a time that suits you.
Book a Demo