You are reading: 4 Common i-mop Problems and How to Easily Avoid Them
28 August 2025
8min read time
Brooke Payne
4 Common i-mop Problems and How to Easily Avoid Them
Share:

Key Insights
- as one of the world’s most popular floor cleaning machines, the i-mop's design is very well proven, durable, and as you’ll discover – easy to maintain
- Some users may find they have questions regarding the use of their i-mop but most queries are easily resolved
- The most common issues impacting floor scrubbers can be easily avoided with common sense and simple, regular cleaning and maintenance
Common i-mop Issues and How to Fix Them
If you’re using an i-mop in your facility, you already know how effective it is at keeping floors clean and safe. Like any piece of equipment, though, it works best with regular care.
The good news? Most i-mop issues are easy to diagnose and even easier to prevent. Below, we’ve listed the most common problems users run into, along with simple fixes and preventative steps.
Not Releasing Water
Symptom
The machine is running, but no water is coming out onto the floor.
Likely Causes
- Blocked gauze filter, squeegee, or squeegee connector.
- Solenoid stuck due to harsh chemicals or lack of rinsing.
- Clogged water tank filter.
Quick Fix
- Rinse the filter, squeegee, and connector with clean water.
- Clean the solenoid if it appears stuck (no removal needed).
- Check and rinse the water tank filter.
Prevention Tips
- Rinse the machine for 30 seconds after each use.
- Stick to low-foam, mild alkaline, or neutral detergents (pH 3–11).
- Avoid strong chemicals that can damage components.

The i-mop is Not Picking Up Water Effectively
Symptom
The machine leaves water or streaks behind instead of vacuuming it up.
Likely Causes
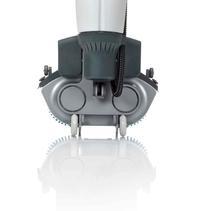
- Blocked squeegee connector, ball float filter, hose line, or plastic deflector.
- Worn or misaligned squeegee blades.
- Worn squeegee castor wheels causing uneven pressure.
Quick Fix
- Remove blockages by rinsing each part with clean water.
- Sweep or vacuum floors before using the i-mop to reduce debris.
- Rotate or replace worn squeegee rubbers.
- Inspect castor wheels and replace if worn down.
Prevention Tips
- Always pre-clean heavily soiled floors.
- Inspect and rotate squeegee blades regularly.
- Check wheels for wear during routine maintenance.
Pro Tip: Regularly rotating squeegee blades extends their life significantly.

Noisy or Faulty Vacuum Motor
Symptom
The vacuum motor is loud, strained, or stops working.
Likely Causes
- Moisture has entered the motor (vac motors don’t like water).
- Overflowing recovery tank.
- Using foaming chemicals.
- Transporting or operating the machine at the wrong angle (handle too low, machine tipped).
Quick Fix
- Empty the recovery tank immediately if water is backing up.
- Continue running the i-mop for 10 minutes to let the motor dry itself.
Prevention Tips
- Empty the recovery tank when refilling or before storing.
- Only use low-foam chemicals with a pH between 3–11 (i-dose is ideal).
- Keep the handle above 32° while operating.
- Transport the machine with both tanks empty.

Floor Scrubber Does Not Turn On
Symptom
The machine doesn’t start even though the battery shows full charge.
Likely Causes
- i-power batteries may have entered “deep sleep” after long storage without charging.
Quick Fix
- Have qualified i-team technicians reboot the batteries.
Prevention Tips
- Always recharge batteries after use, especially before long storage.
- Store batteries on the charger to maintain cell health.
Pro Tip: Charging after every use keeps batteries healthy and ready when you need them.

Conclusion
We hope you’ve found some value in our guide to what can go wrong with your i-mop , and you’ve picked up some simple preventative maintenance tips to keep your i-mop in tip-top shape. If you'd like to see the i-mop in action, remember that you can Book a FREE demo by filling out this form.
Common Questions We Hear
What is the most common mistake in mopping?
According to cleaning experts, the most significant and potentially costly mopping mistake is using too much water on moisture-sensitive floors, such as hardwoods and laminates. "Excess water can warp your hardwood floors and cause your laminates to bubble," warns Melissa Homer, Chief Cleaning Officer for Microfiber Wholesale.
How to avoid water marks when mopping?
To maintain clean mop water, change it frequently, and ensure your mop is clean before you start. If possible, use distilled water, and after mopping, dry the floor with a clean, dry mop pad or towel to prevent streaks.
Does boiling water help mopping?
Many people believe that mopping with boiling water is necessary for thoroughly cleaning floors. However, this is a myth. Instead of improving the cleanliness, the high temperature of the water can actually have a negative effect. Additionally, never use boiling water in your floor scrubber machines—it’s important to use room temperature clean tap water to avoid damaging the equipment.
How do I keep my floor shiny after mopping?
Clean the Floor: Start by thoroughly cleaning the floor, as dirt and debris can dull the shine.
Buff the Floor: After damp mopping, use a dry microfiber mop or cloth to buff the floor. Gently work in large circles to polish each section.
Use a Commercial Polish: Apply a commercial hardwood floor polish to enhance the shine and protect the surface.
Use a Floor Scrubber: Most floor scrubbers come with a polishing pad that can buff and shine certain floor types. Regularly follow this cleaning procedure to maintain a shiny floor.
Protect the Finish: Use rugs and furniture pads to protect the floor from scratches and wear.
Refinish the Hardwood: If the floor’s finish is worn, consider refinishing it to restore its original shine.
Watch this video to see the 4 common problems with the i-mop and how to avoid them
Products Featured Inside this Article
Media and Insights
Join the movement that's changing what clean means.
Be part of a cleaner world. Get a live demo at a time that suits you.
Book a Demo