You are reading: How to Use Your Floor Scrubber More Effectively (Even If It’s Not Ours)
13 August 2025
4min read time
Brooke Payne
How to Use Your Floor Scrubber More Effectively (Even If It’s Not Ours)
Share:

Key Insights
- Small adjustments make a big difference — from deep-cleaning tanks to rotating pads, small tweaks can dramatically improve cleaning performance.
- Squeegee care is essential — a well-maintained squeegee determines the final finish, preventing streaks and excess water.
- Know your machine’s limits — not all scrubbers clean to the edge like an i-mop, so adapt your technique to cover missed areas.
Whether you’ve been using a floor scrubber for years or just picked one up last week, there’s always room to improve your results. While most operators know the basics, it’s the less obvious habits and techniques that separate an average clean from a professional finish.
These tips work for any floor scrubber — no matter the brand — and are designed to help you get better cleaning performance, faster results, and longer machine life.
Book A DemoDeep-Clean Your Tanks, Not Just Rinse Them
Most operators give their fresh and dirty water tanks a quick rinse at the end of the day, but biofilm, mildew, and mineral deposits can still build up inside, especially in the recovery tank.
- Every 1–2 weeks, remove lids and access panels and scrub inside with a non-abrasive brush.
- Use a neutral detergent to break down odours and grime that a rinse won’t touch.
- Pay attention to tank corners and seams where buildup hides — it can affect water flow and even leave odours on “clean” floors.
Upgrade Your Pad or Brush More Often Than You Think
A pad or brush doesn’t need to look shredded to be underperforming. Worn fibres reduce agitation, meaning you’re scrubbing but not actually removing deep dirt.
- Rotate pads weekly to ensure even wear.
- Replace sooner if you notice your floors looking dull or streaky after a clean.
Keep different pads for different floor types — don’t use a pad that’s been on concrete for vinyl floors.
The i-mop have a wear indicator on the brush in yellow so you know when its time to replace.

Slow Down on the First Pass, Speed Up on the Second
For heavily soiled floors, the first pass should be slower to give the pad/brush and detergent maximum contact time. On the second pass, move slightly faster while vacuuming up the dirty water. This two-speed approach lifts more dirt without over-wetting.
Don’t Ignore Your Squeegee
Most operators focus on scrubbing, but your squeegee determines the final finish. A poor squeegee setup can make even a perfectly scrubbed floor look dirty or leave water on the surface.
- Inspect daily for nicks, cracks, or curled edges — even a small defect can leave water streaks.
- Flip or rotate the squeegee blades when wear is visible, rather than waiting for full replacement.
- Keep the blade pressure even across the floor; uneven pressure leaves lines of water behind.
Clean squeegee channels of grit and hair — debris can block full contact with the floor.
If the floor looks soaked after a pass, your vacuum or squeegee setup needs attention. A slightly damp sheen should remain, drying quickly in a minute or two. Pools of water = wasted work and risk of streaks.
Edge Cleaning Matters
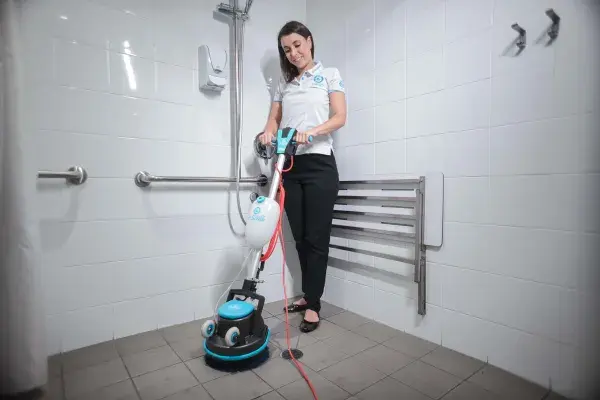
Not all floor scrubbers are the same when it comes to edge cleaning capability. Machines like the i-mop can clean right to the edge, eliminating the need for additional tools or passes. But for other machines that can’t get that close, remember to:
- Run a quick pass along wall edges before your main scrub.
- Use a smaller tool or mop to remove debris in tight corners.
- Prevent dirt from being pushed into open floor areas where it can leave streaks.
Adjust Pressure for Floor Type
Too much pressure can wear down pads faster and damage delicate surfaces; too little pressure leaves grime behind.
- On soft vinyl or wood-look floors, reduce pressure to avoid micro-scratches.
- On textured tile or concrete, increase pressure for deeper cleaning.
Many operators stick to one setting for everything — but adjusting it can make a big difference in cleaning quality.
Keep Solution Warmer (When Safe)
If the floor type and chemical allow, warm solution can help break down grease and grime faster than cold water. Just make sure the flooring manufacturer recommends it and never exceed chemical temperature limits.
Final Thoughts
You don’t need a brand-new floor scrubber to see better results — you just need to know how to get the most from the one you have. By going beyond “basic” operation and focusing on small changes with big impact, you can improve cleaning performance, reduce downtime, and keep your floors looking their best.
Want more information on the i-mop? Then reach out for a quote here .
Products Featured Inside this Article
Media and Insights
Join the movement that's changing what clean means.
Be part of a cleaner world. Get a live demo at a time that suits you.
Book a Demo